本文最后更新于410 天前,其中的信息可能已经过时,如有错误请发送邮件到1986413837@qq.com
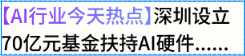
1.实现内容超过两行自动省略 超出部分显示…
实现目标如下
最烦的就是这个渐变色文字 要给他添加盒子 然后在后面加内容文字时 会上下排列 而不是跟着渐变文字 令人十分不爽
后面想到了用浮动啊 让渐变文字盒子float : left 就行了 内容文字就能接上了
代码如下 有个缺陷是渐变文本不能多行 否则直接占有两行
<view class="hot">
	<view class="hot_text">
		<view class="niceColor">
			[AI行业今天热点]
		</view>
		深圳大学近期发布关于AI+前端新时代演讲 震惊世人
	</view>
</view>
CSS代码 用到很多不常用属性
.hot {
	width: 100%;
	font-size: 24rpx;
	font-weight: 600;
	.hot_text {
		-webkit-line-clamp: 2;
		display: -webkit-box;
		-webkit-box-orient: vertical;
		text-overflow: ellipsis;
		overflow: hidden;
		.niceColor {
			float: left;
			background: linear-gradient(to right, #9949fc, #6a89fa);
			color: transparent;
			-webkit-background-clip: text;
		}
	}
}
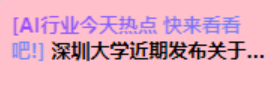
最终优化版本!!! 好像都设成text就行了

<view class="hot_text">
	<text class="niceColor">
		[AI行业今天热点]
	</text>
	<text class="normalText"> 深圳大学近期发布关于AI+前端融合最新消息 世人震惊</text>
</view>
.hot_text {
	display: -webkit-box;
	-webkit-line-clamp: 2;
	-webkit-box-orient: vertical;
	overflow: hidden;
	text-overflow: ellipsis;
	.niceColor {
		background: linear-gradient(to right, #9949fc, #6a89fa);
		color: transparent;
		-webkit-background-clip: text;
	}
}
2.设置CustomNavBar组件 解决手机状态栏和小程序胶囊按钮问题
(1) 分析CustomNavBar组件高度组成
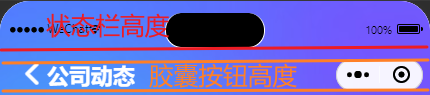
CustomNavBar组件高度 = 状态栏高度 + 胶囊按钮高度 + 2 * [ top(胶囊按钮高度) – 状态栏高度 ]
(2) 在utils目录下添加system.js文件 用于获取设备信息 这里可以去看Uniapp文档
system.js
const SYSTEM_INFO = uni.getSystemInfoSync(); //获取系统信息函数

export const getStatusBarHeight = () => SYSTEM_INFO.statusBarHeight || 15; //获取手机状态栏高度

//获取标题栏高度
export const getTitleBarHeight = () => {
	//获取胶囊按钮状态
	if (uni.getMenuButtonBoundingClientRect) {
		let {
			top,
			height
		} = uni.getMenuButtonBoundingClientRect();
		return height + (top - getStatusBarHeight()) * 2
	} else {
		return 40;
	}
}
//状态栏+标题栏高度
export const getNavBarHeight = () => getStatusBarHeight() + getTitleBarHeight();
(3) CustomNavBar.vue 导入需要的高度信息 设计自己喜欢的样式
<template>
	<view class="layout">
		<view class="navbar">
			<view class="statusBar" :style="{height:getStatusBarHeight()+'px'}"></view>
			<view class="titleBar" :style="{height:getTitleBarHeight()+'px'}">
				<view class="title">
					<navigator url="/pages/index/index" open-type="switchTab">
						<uni-icons type="left" color="#fff" size="30"></uni-icons>
					</navigator>
					<view class="">
						公司动态
					</view>
				</view>
			</view>
		</view>
		<!-- 头部导航栏布局设置了fixed 悬浮在最上面 会盖住banner区域 加一个fill盒子把banner撑下去 -->
		<view class="fill" :style="{height:getNavBarHeight()+'px'}">
		</view>
	</view>
</template>

<script setup>
	import {
		ref
	} from 'vue';
	import {
		getStatusBarHeight,
		getTitleBarHeight,
		getNavBarHeight
	} from "@/utils/system.js"
</script>

<style lang="scss" scoped>
	.layout {
		.navbar {
			position: fixed;
			top: 0;
			left: 0;
			width: 100%;
			z-index: 10;
			background: url('/common/images/index/header_background.jpg') no-repeat;
			background-size: cover; //确保与背景颜色自然过渡

			.titleBar {
				display: flex;
				align-items: center;
				padding: 0 30rpx;

				.title {
					font-size: 22px;
					font-weight: 700;
					color: #fff;
					display: flex;
					align-items: center;
				}
			}
		}
	}
</style>3.有趣的右箭头CSS画法
比较简单 不多解释

.right {
	width: 16rpx;
	height: 16rpx;
	border-bottom: solid 4rpx #000;
	border-right: solid 4rpx #000;
	transform: rotate(-45deg);
}